An official website of the United States government.
Here's how you know.
Official websites use .gov
A .gov website belongs to an official government organization in the United States.
Secure .gov websites use HTTPS
A lock () or https:// means you've safely connected to the .gov website. Share sensitive information only on official, secure websites.
Airborne Uploader
Getting Started Guide
If you have been contracted to provide data to EGP or wanting to use the application for uploading to Intterra please reach out to us for where you can download the application. This is a standalone application and can be run on any non-government Windows computer. We are in the process of getting a Technical Approval for federal equipment in future releases. You will receive credentials to be able to upload data to the EGP Airborne Archive. This setup process should take under 5 min to get up and running. Any issues please contact our staff for assistance.
Setup
- Download the application from the provided location when we issue your account credentials and place the program in a folder that you like. This can be in the same "Intterra DSA" folder or a new one. We recommend you do not leave it in the Downloads folder or on the Desktop.
- Download the airborne config file attached in the welcome email. This can go into the same folder as the application or delete once you have installed (imported) the configuration into the application. EGP will keep a copy of these credentials on file if you need to follow the one time setup process again. You will see two entries one for EGP Airborne Archive and one for Testing and Training purposes.
- Run "EGP Airborne Uploader" by double clicking on the software. The first time you should see a blue screen saying, “Windows protected your PC”. You will need to click the More text than click "Run anyway" button. Once this is done it will not ask again.
-
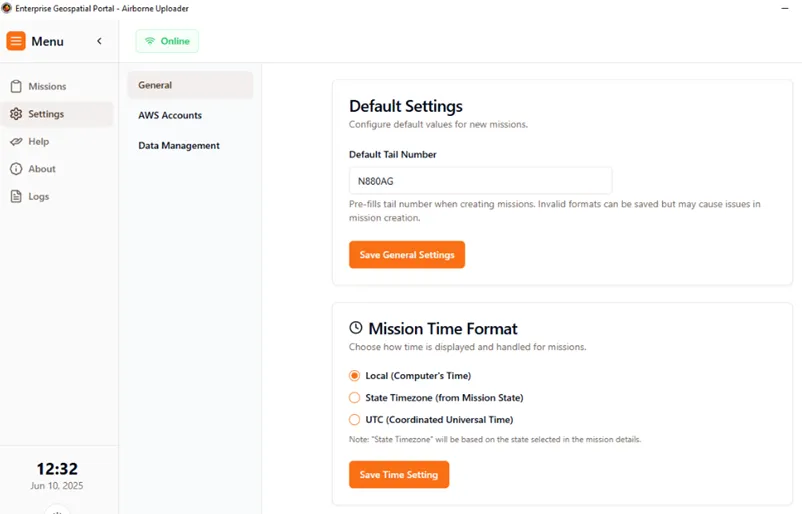
The app should open, and you will need to follow these initial setup steps. Note to complete these setup steps when you have internet connectivity.4.1. Go to “Settings > General” and enter your Tail number ie. N880AG and click “Save General Settings”
 4.2. Go to the “Settings > AWS Accounts” and click “Import Config”, select the file provided in this email and you should see 3 entries show up with yellow triangles. Once they have been loaded click the (i) on the right side and you should see each triangle turn green as being verified.
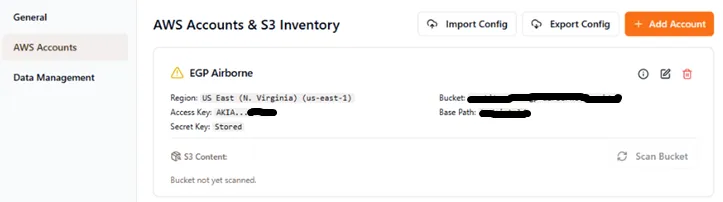 4.3. You can validate the credentials are working by clicking the “Scan Bucket” and you should see some number for the various S3 buckets.
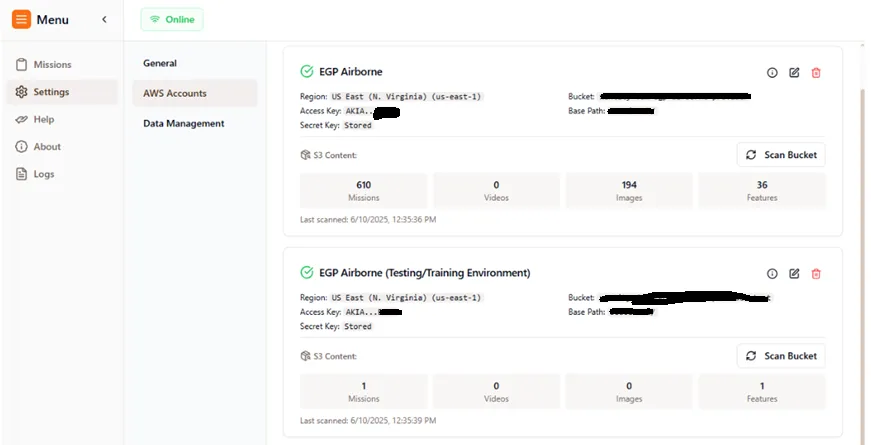
-
You ready to go! Creating a mission can be found in the next section.
New Mission
-
To begin you can create a test mission and use the “EGP Airborne (Testing/Training Environment)” account and upload whatever you want to get familiar with the process. This data is sent to a S3 bucket that is not monitored and will not be included in any Web Applications ie. WildFireSA Advanced or Intterra SA. This environment is only to test out how the software works or any assistance in debugging.
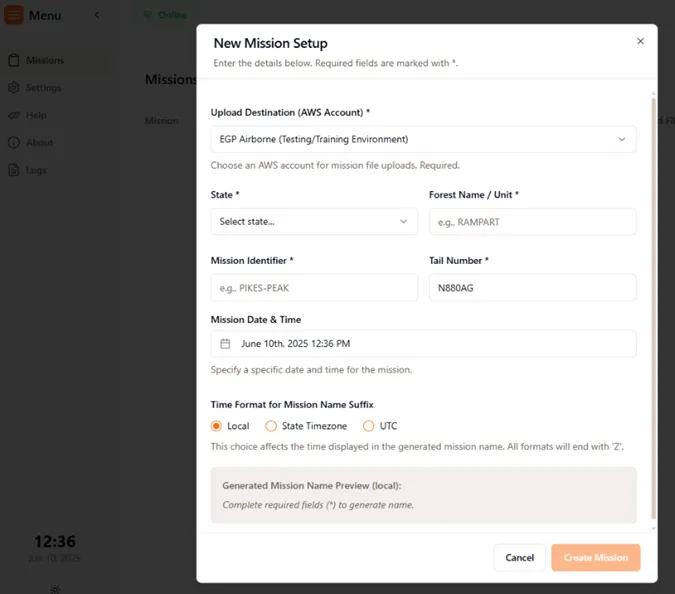 1.1. Select the “Upload Destination”1.2. Select the State, Unit, Mission ID, and Tail Number. Note your tail number should be set based on the default you setup earlier.1.3. Mission date will use the time you started creating the mission by default. If you prefer to back date or future date, select click to edit the date/time.1.4. Leave on “Local” time format.1.5. You should see a preview of your mission which is what will be used for filenames and mission files.1.6. Click “Create Mission”. This will create the mission locally that files can be added next or at a later time. You can also return to an existing mission if it is a new day and new files to the same mission.
 -
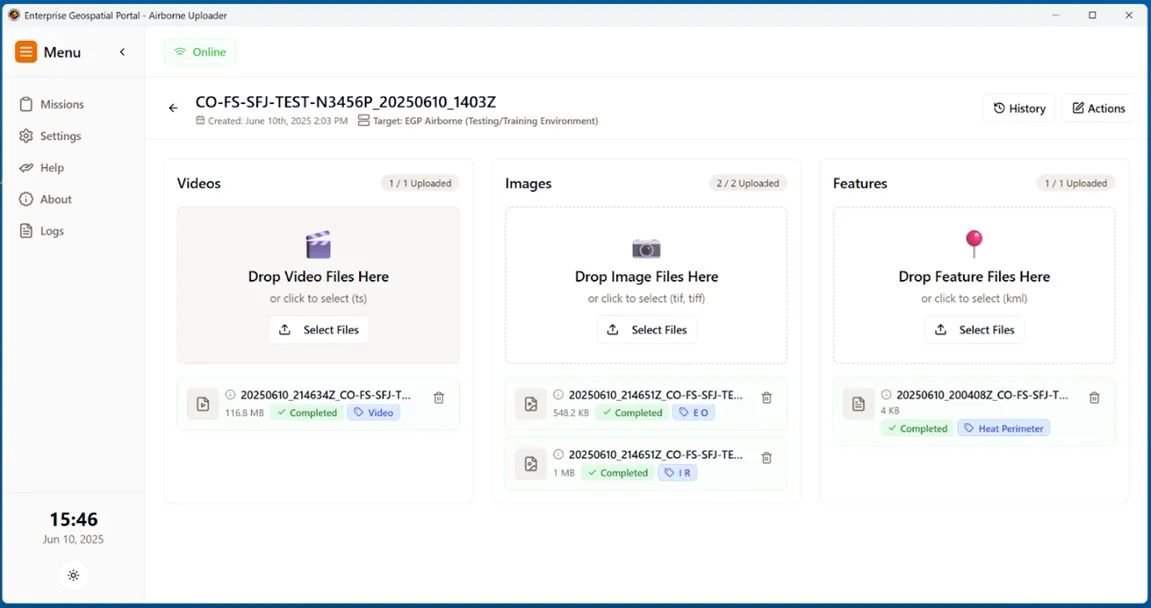
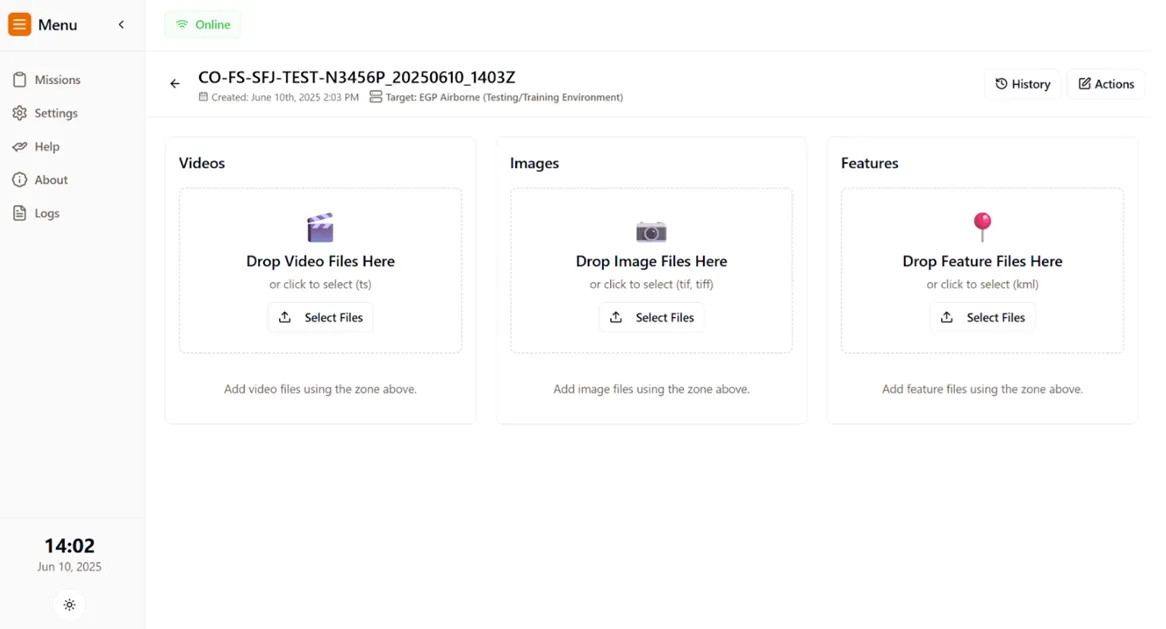
Click the “Select Files” on either the Video, Images or Features to add the appropriate data to the mission. If you are online, it will immediately upload the files. It will also create a new filename that matches the files that were added. You do not need to edit the source filenames for any reason. You will see in tooltips the source and destination filenames.
-
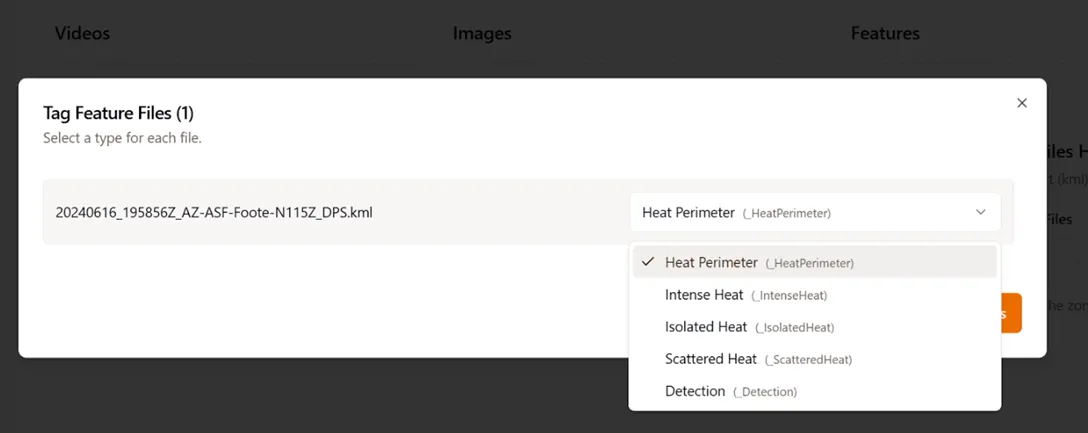
If you add files to the Images or Features, it will pop up a prompt to select the type of KML or Tiff files. Ie. EO IR, Heat Perimeter, etc.. Select the correct type and select “Confirm Tags and Add Files”
-
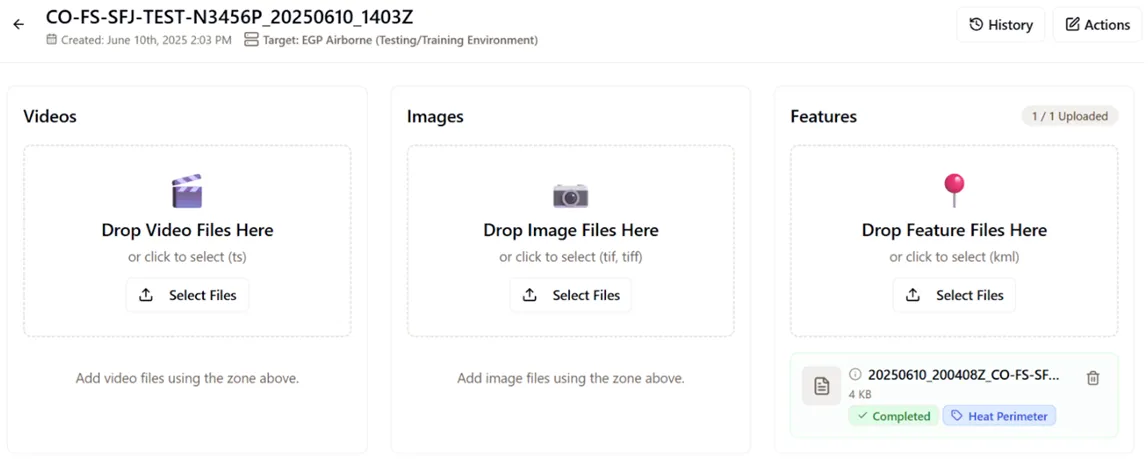
Once added you will see a status of it they have been successfully updated or not.
-
If you are offline, you can still prep the files and once internet is back or at the base these images will be uploaded.
Know issues
- Right now, the Drag and Drop of files into the different drop zones may not work. You will see a red notice that says path can not be found. We have noticed this on some computers but not others and are currently working on a patch. In the meantime, the “Select Files” should work fine and is the preferred method to upload files.
FAQ
Troubleshooting questions FAQ is found directly within the application in the help section. Here you can find general FAQ related to who should be using this application.
How do I become a provider to share mission data to EGP?
You can share mission data by registering as a data provider.
How do I setup and install the EGP Airborne Uploader?
Once you are registered you will be provide a link to download the Windows program file along with a configuration that you can use to send data.
Can I use the existing Intterra Airborne Intel Data Shipping App?
No, if you are currently using the Intterra DSA you will need to use the EGP Airborne Uploader to send us data. Note that Airborne Uploader can support sending data directly to Intterra and is backwards compatible with the naming conventions.
Do I have to be a Federal IAA Mission to send data to EGP?
No, if you are a state or local provider collection wildfire data then we can set you up with an account to send data to EGP.
Will EGP send my data to Intterra as well?
Yes, if you already have an account and would like EGP to federate and send a copy of all files to Intterra please let us know.
Can you send my data to other locations if we send it to you first?
Maybe, currently we only support federating to other AWS S3 buckets in the file formats uploaded via the Data Shipping App.
What file types are supported for upload?
The EGP Airborne Uploader supports Transport Streams, KML, and TIFF. When adding files, you will be prompted to select the correct type.
Can I use the application without an internet connection?
Yes, you can prepare and add files to missions while offline. Uploads will resume automatically when you reconnect to the internet.
Is there a way to test the uploader before sending real data?
Yes, you can use the “EGP Airborne (Testing/Training Environment)” account to upload test data without affecting production systems.
What happens if I lose my configuration file or credentials?
Contact EGP support to have your credentials reissued. The setup process can be repeated if needed.